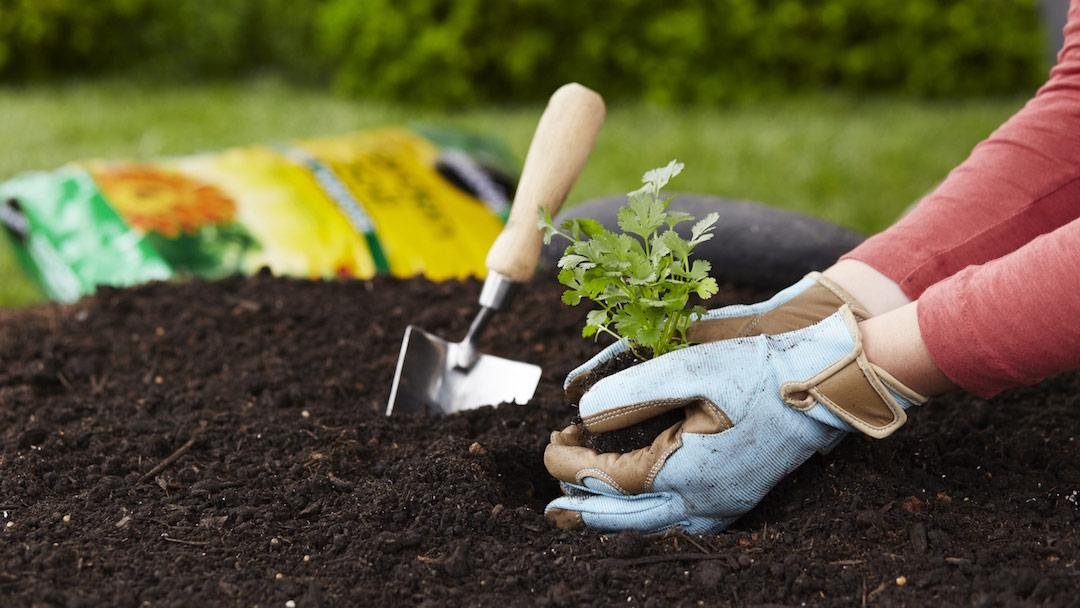
Transfer plants to containers and planting beds as soon as the soil is warm enough. It’s not ideal for plants to remain in the pots they were sold in, especially small cell packs. Plants may become root-bound and start to suffer from malnutrition. But don’t plant too soon. Damp, cold soil can cause plants to stall and even rot.
Garden Plans:
If you can’t tackle planting right away, store plants in a spot somewhat sheltered from direct sun to slow down soil drying and reduce watering chores. Where plant supplies are limited, you might end up purchasing plants too early for planting. In this case, locate plants where you can protect them from a late frost — and where nibbling bunnies or deer won’t easily find them.
Tips For Successful Planting:
Soak terra-cotta or other porous containers in water before planting. Otherwise, the dry pots will wick moisture out of the soil and away from plant roots. Block drainage holes with a piece of screen, coffee filter, or newspaper to keep soil from spilling out. Cover the bottoms of containers 12 inches and larger with a few inverted plastic 4-inch pots. Don’t fill more than one-third of the total container volume with empty pots. This technique reduces the pot’s weight and the amount of soil you need. It also increases airflow around plant roots. Skip this step if you’re filling the pot with permanent plantings that will remain in the pot for years. Fill a container half to three-quarters full with potting mix. Blend in slow-release fertilizer and water-retention crystals. Top with more mix. Arrange plants, in their pots, on top of the planting bed. Finesse the arrangement until you’re happy with it. With containers, first arrange the plants on a nearby surface, then duplicate that configuration in the pot. Moisten the root balls before planting, especially if they’re dry. Remove one plant at a time from its pot. With small pots, gently squeeze the pot and turn it over, cradling the plant’s stem with your hand. The plant should slip out of the pot. With larger pots, lay the pot on the ground and press on it on several sides. Invert it, and the plant should slip out. Never pull a plant out of its pot by the stem; you risk breaking it. Dig a shallow hole in the soil to accommodate the plant’s root ball. For plants with small root balls, speed up the process with the stab-and-plant method. Grab a trowel with the blade facing down and the concave side toward you. Stick it into the soil and pull gently forward, forming a hole. Slip the plant into the hole. Add and firm the soil around the young plant. In containers, add soil around plants, gently tamping but not packing. Leave 2 inches between the soil surface and the top of a container to provide room for mulch and water. Water plants once they’re in the soil. Soak the soil thoroughly with a gentle shower. Irrigate a container until water flows freely from the drainage hole.
Mulch:
Add a layer of mulch to plantings in beds and containers. Mulch slows water evaporation from soil, reduces soil temperature, and helps suppress weeds. Gritty mulches discourage slugs. Rocky mulch can deter digging rodents. In planting beds, add a 2-inch layer of mulch, but make it 3 inches in the hottest regions. In containers, add 1 inch of mulch, leaving 1 inch of space between the mulch and the lip of the pot.
Keep Plant Tags:
Save your plant tags to reference future plantings. In a container, tuck the tags along the edge of the pot. If the planting is pleasing, save those tags for the next year’s shopping list. With in-ground plantings, stash tags in a labeled envelope and keep the tags of plants that you want to repeat in future.Save your plant tags to reference future plantings. In a container, tuck the tags along the edge of the pot. If the planting is pleasing, save those tags for the next year’s shopping list. With in-ground plantings, stash tags in a labeled envelope and keep the tags of plants that you want to repeat in future.Save your plant tags to reference future plantings. In a container, tuck the tags along the edge of the pot. If the planting is pleasing, save those tags for the next year’s shopping list. With in-ground plantings, stash tags in a labeled envelope and keep the tags of plants that you want to repeat in future.
How Many Plants Do You Need?
It’s easy to overbuy when confronted with beautiful blooms and foliage hues en masse at a garden center. Determine beforehand how many plants you’ll need for your planting beds.
1. Research: Research the plants you want (to determine plant spread or spacing).At the garden center, that information appears on plant tags. To determine how many plants to buy, divide the length of your bed area by the plant spacing. Repeat with the bed width, and multiply those two numbers. That’s how many plants you’ll need to fill your bed.
2. Space:
Spacing varies. If you have a long growing season, space plants farther apart. Gardeners in Northern areas can space closer for the best show. Some annuals, such as Supertunia petunias, grow so vigorously that they need ample spacing: one plant every 10-15 inches. You can safely space most plants at a distance equal to half their mature height.
3. Avoid Crowding:
Don’t plant shoulder to shoulder. It yields instant impact, but plants become overcrowded and require more frequent watering and more fertilizer. Crowded plants also are more susceptible to disease.
4. Buy More:
Buy about 10 percent more plants than you need so you have extras to fill curving bed edges and to replace any plants that die early in the season. Tuck extra plants into garden beds or into pots on a deck or patio to unify garden and outdoor living areas.


